in Column A. Dictations that are blocked or in progress cannot be loaded. Several dictations can be selected and previewed. More details under Loading a Dictation.
To edit a dictation it must first be loaded into the Recorder. Do this by double-clicking the Loudspeaker symbol in Column A. Dictations that are blocked or in progress cannot be loaded. Several dictations can be selected and previewed. More details under Loading a Dictation.
To make a dictation that is blocked or in progress available for loading it must be unblocked by right-clicking on that dictation's row in Dictation Overview (normally marked in bright green) and selecting the menu option "Unblock Dictation".
 A dictation can only be unblocked by the same user that originally blocked it. This prevents multiple users simultaneously loading and editing the same dictation. If another user has opened the dictation it is highlighted in olive green.
M
oving the mouse pointer onto that dictation in the overview will display a tooltip indicating who (typically a typist) has currently loaded that dictation. Format is Computer_name / User_login_name.
Left-click on the gray field (1) on the extreme left of the rows in Dictation Overview to select that dictation .

 Selected dictations are highlighted in blue.
 Blocks of multiple dictations can be selected by pressing the [Shift] key while selecting multiple rows.
To select multiple, non-adjacent dictations press the [Ctrl] key while selecting rows.
Clicking on the topmost gray field (2) will select all the active dictations.
The [Shift] and [Ctrl] keys can be used one after the other to select the desired dictations, very similarly to Windows Explorer.
Selected dictations can be moved, deleted, cloned, set as completed, sent to background speech recognition or send by E-Mail. In addition to the audio file itself, the dictation may include written documents, attached documents and linked documents. A Memo card can be displayed for each dictation showing the most relevant details.
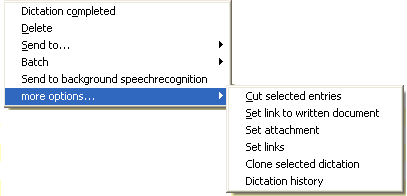
After selecting a dictation, right-click and choose an option from this menu:
Click on the items in the above graphic to find more information
A dictation can have its status set manually to "completed" by selecting it, right-clicking on it and choosing the option "Dictation completed". This will cause it to be moved to the "completed dictations" folder (..\ERL in Windows Explorer), and it will no longer be visible in the "uncompleted dictations" folder.
A dictation is normally marked as completed by the typist by clicking the Save (completed) button in the Player. If the dictation is completed outside the Player program, the manual procedure described above must be used.
Selected dictations can be deleted by right-clicking on them and selected the menu option "Delete" . The DEL key on the keyboard can also be used.
The dictations will be permanently deleted from the server and will not be found in the Recycle Bin. A backup does exist, however, on the local hard drive of the author.
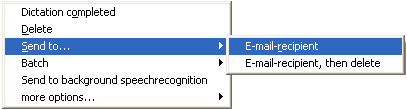
To send a dictation in the Dictation Overview by e-mail, first select it, then right-click on it. Select the menu option "Send to E-Mail recipient". The dictation will then be compressed and sent as an e-mail attachment. To show that the dictation has been e-mailed, a Loudspeaker-with-Envelope icon will appear in Column A.
Audio files can only be sent from the Recorder. The "E-Mail" option is only available in the Player when a the dictation includes written, attached or linked documents. There is an Advanced Option to enable audio files to be sent from Player if required.
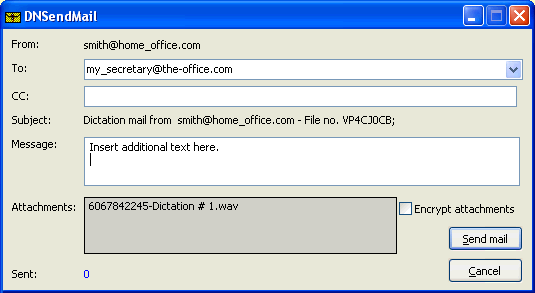
Under the e-mail program and encryption options can be selected. If a MAPI compatible e-mail program is selected, the dictation will be compressed, encrypted and sent via the Outbox of the e-mail program. If the option "via SMTP Email transfer" is selected, the dictation will be sent directly from the integrated Send Mail Window.
In the Send Mail Window (used only if SMTP is selected) the user can input the addresses, additional text (if any) and choose the encryption option if desired. On clicking the dictation will be compressed, optionally encrypted, and sent.
If you are using the Batch function, then it is possible to select, print, send by e-mail, complete, print or delete a group of dictations which have a common batch number. A batch process list can be printed to show the work-status of all dictations in the batch, including: number, modified date, length, Finish by deadline, priority and remarks. The data shown in the Batch No. column is composed of Author ID, Batch number and sub-item (dictation) number. Batch numbers are entered in the Save Menu.
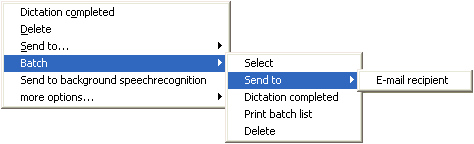
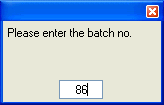
After selecting the required function, a small pop-up window appears to select the batch. Enter the numerical number, without the Author ID or / sub-item no. and press the [ENTER] key.
When Dragon NaturallySpeaking is installed and activated on the Speech Recognition Option tab, then this option can be used to send audio dictations (.wav files) to the Dragon recognition which will return a text (.dra and .rtf files) some minutes later. The User must have access to the corresponding trained profile of the author on the server. This is ideal for mobile voice recorders. When complete, the dictation will have the loudspeaker-on-sheet-of-paper symbol  in the A column. The corresponding Dragon User-name must be selected in the BGSR ID column.
To move one or multiple selected dictations to a different folder, first select them, right-click and choose the option "Cut selected items". Then right-click in the Dictation Directory on the folder into which the dictation(s) should be moved, right-click and choose the menu option "Paste selected entries".
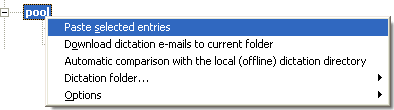
Dictations can also be moved via drag-and-drop into other folders of the Dictation Directory.
Dictations can also be moved using the Statistics view: dragging and dropping a dictation from the Overview below onto a Statistics graph bar (red for unfinished) will move it to the folder shown there.
A dictation in the recorder can be cloned (duplicated) and a second, identical dictation created.
To clone a dictation, select it in Dictation Overview and right-click on it. Select the menu option "Clone selected dictation" . A cloned copy of the dictation will be created and loaded into the Recorder for editing. When the editing has finished, click the Save button in the Save menu.
You can edit the dictation information fields in the Save Menu if the data for the original dictation is no longer appropriate to the cloned copy. After making any necessary changes save the cloned copy by clicking the Save button.
Dictations can be cloned in the Player if has been checked. This setting is for all typists, and can only be changed after first entering the correct PIN.
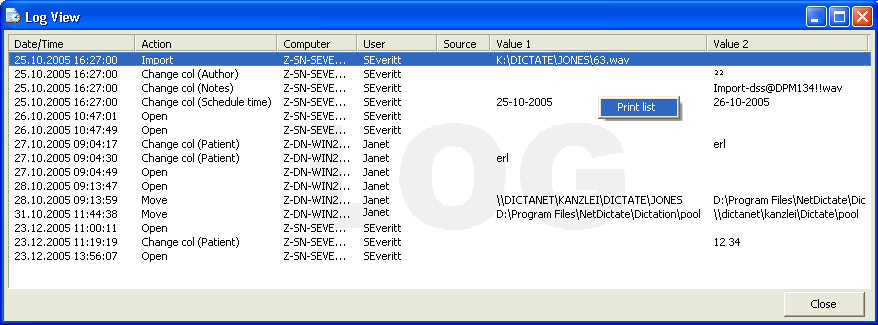
The Log View can be printed with a right mouse click anywhere on the view.
To attach documents to a dictation, first select it, then right-click on it and choose one of the following menu options: Set link to written document, set attachment or set links.
Files can be linked to the audio file in three ways:
The written document can be linked (i.e. the transcription of the dictation)
Copies of attachments can be added (i.e. documents that form part of the same matter, e.g. an invoice in a spreadsheet file, specialist's report or client contract)
Links to other relevant internal documents (e.g. notes for the typists) that will not be sent should the dictation be e-mailed
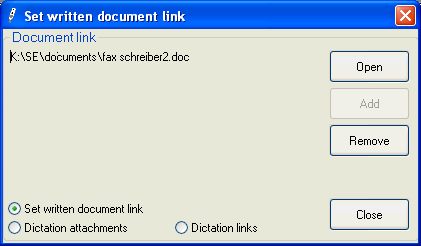
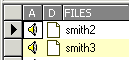
One "written document" (transcription of the dictation) can be linked to the dictation. Once linked, it will be indicated by the piece-of-paper symbol in Column "D". A single-left click on this symbol will open the up-to-date document.
This document will be sent as an attachment if the dictation is e-mailed.
Up to 99 supplementary files can be attached as copies of the original. Simply click on the button in the Dictation Documents window and browse to the file. Note that a copy is made and any later updates to the document will not be reflected in the Workflow.
In the Dictation Manager can be configured to automatically open these documents when the dictation is loaded.
These documents will be sent as an attachment if the dictation is e-mailed.
Multiple documents can also be linked to a dictation. In the Dictation Manager can be configured to automatically open these documents when the dictation is loaded.
These documents will not be sent as an attachment if the dictation is e-mailed.
Click on and then browse to the relevant file.
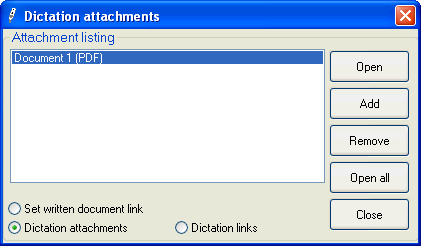
Files listed in this window can be selected by left-clicking on them.
If the button is then clicked, the selected files will be opened in the relevant external program (e.g. a word-processing program for a text file). will open all files whether selected or not.
Use the button to delete selected files from the window.
Files can be selected as a written document, attachment, or link using the radio buttons  at the bottom of this window.